Pimp my GitHub profile
Published: March 6th, 2021
Most likely everybody around already found out how to setup a customized GitHub profile by now. But you can do a lot more than just add some text to your profile. What I did on my profile page and how to setup everything, I will show you in this article.

Basic setup of a GitHub profile page
To get your profile running, you only need some plain setup:
- a public repository named as your GitHub username (for me it is sharafc)
- a README.md
- some content written in Markdown or HTML
As soon as you push your changes to your public main branch, your profile will be visible to everyone!
Add some beef to the profile
Now you have many options available, you can just go with a very simple "Hello world" edited in GitHubs file editor or you can do a bit more and place some information about yourself and start doing things in your IDE.
To get started with Markdown, you should have a look at this Markdown Cheatsheet on GitHub. If you work with Visual Studio Code you can have some comfort while editing and previewing Markdown files by using a Plugin called Markdown Preivew Enhanced.
Custom tech badges
Most of us will want a nice possibility to display technologies of our daily work or you are profound with. I use two nice services named Shields and Simple Icons. With those two combined you can create really awesome looking badges.
For the Badge


Plastic


Flat Square


and many more... But my favourite really is the "for-the-badge".
Advanced setup with GitHub Actions
So now we have some nice content, some badges and everthing is fine. Let's spice it up a bit more!
Many of us have a blog running (like the one you are reading now), or are content creators e.g. on YouTube. Wouldn't it be nice to have your latest posts or videos showing up in the profile? Sure it is!
Thanks to Gautam krishna R we have an absolutely awesome GitHub Action Workflow at our disposal.
Setting up the workflow
To set up the workflow you have to do some simple steps.
First you have to create a folder named .github and create a workflows directory inside it. Then you must create a new file named blog-post-workflow.yml with the following contents inside this folder:
name: Latest blog post workflow
on:
  schedule:
    # Runs workflow automatically every hour
    - cron: '0 * * * *'
  workflow_dispatch:

jobs:
  update-readme-with-blog:
    name: Update README with latest blog posts
    runs-on: ubuntu-latest
    steps:
      - uses: actions/checkout@v2
      - uses: gautamkrishnar/blog-post-workflow@master
        with:
          feed_list: "yourfeedurl"
Hint: You can add as many feed urls to the feedlist as you like.
Add the following placeholder to your README.md.
 <!-- BLOG-POST-LIST:START -->
 <!-- BLOG-POST-LIST:END -->
The workflow will look for this segment and replace it with the fetched content.
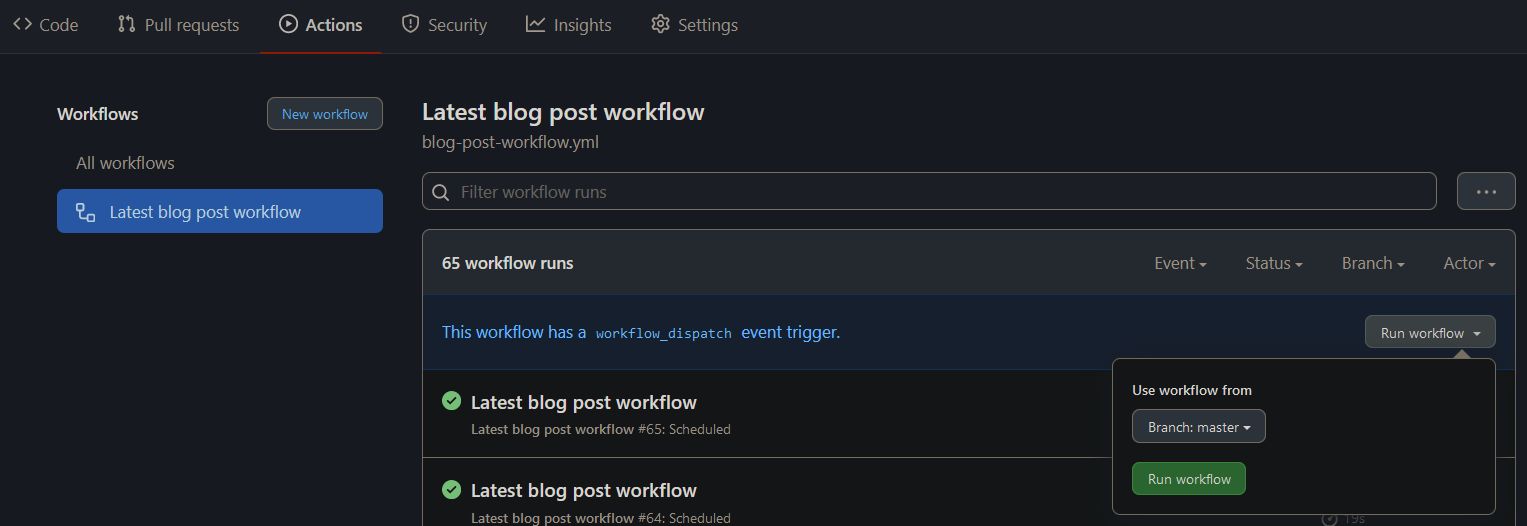
Now you have to check everything in on your main branch and go to the GitHub repository. At the Actions tab you will now find the just defined workflow which will be executed every hour. Since you have just checked in everything, you may want to trigger the workflow at least once by hand.

The workflow itself has much more configuration possibilities. Iy you want to dig deeper into it, just have a look at the Workflow page I linked above.
Resume
This is clearly only a start. There are a lot of workflows already out there. One other big one creates some more fancy GitHub stats than GitHub itself and many many more. For me this is just enough. Showing my blogpost is already a nice to have and helped me to get introduced to GitHub Actions.


